Showing posts with label recipes. Show all posts

Sunday, July 7, 2013

It's A Pizzookie!!

WHAT is a Pizzookie??  First of all, I love them name.  Say it out loud.  It's fun to say, just like Francisco.  I think Buddy the Elf would love to say Pizzookie.

Here's what it is:  it's a Pizza/Cookie.  Alaina came home from Arizona and raved about something called a Pizzookie.  Apparently they are quite the thing in Arizona.  You can order them at most restaurants, and they come in cast iron skillet with ice cream plopped on top.  You eat it right out of the skillet, sharing it...each man for himself.

So I've been eyeing different recipes, and found one here that sounded very similar.  I made it last night, and I do believe this will be my requested birthday dessert from this day forward.  It was delicious, and it was so fun to eat.  I pulled it out of the oven after the girls were in bed (ssshhh!) and Brad, Alex, Alaina and I happily shared it.  We may have finished off the whole thing.  It's a FUN dessert, super yummy, and will be on our regular rotation of requested desserts!


Chocolate Chip Pizzookie

1/2 cup butter
1/2 cup dark brown sugar
1/2cup white sugar
1 egg
1 1/2 cups flour
1/2 tsp baking soda
1/4 tsp salt
1 tsp vanilla
1+ cups chocolate chips

Melt the butter over medium heat in an 8-inch cast iron skillet.  When the butter is melted, add the sugars and whisk together in the skillet.  When the sugar is all incorporated and melted into the butter, remove the skillet from the heat and set aside to cool for 5 minutes.  In a small bowl, whisk the egg.  Add a spoonful of the hot sugar/butter mixture to the egg and whisk well (to temper the egg so it doesn't scramble when you add it to the skillet.)  Whisk the egg into the skillet mixture and blend well.  Add the flour, baking soda, and salt.  Stir carefully with a wooden spoon to incorporate.  Mix in the vanilla and the chocolate chips.  (I used 1/2 dark chocolate, 1/2 semi-sweet, probably a bit more than 1 cup total.  Some of the chocolate will begin to melt in the hot mixture, don't worry about that.  Just mix it in well...the gooier the better!)  Spread the mixture evenly across the skillet, and put it into a 350 degree oven for 15-20 minutes, or until the edges lightly brown and the center seems set.

Remove from the oven and let set about 5 - 10 minutes.  Scoop vanilla ice cream right in the center, hand out spoons and dig in!!

This would be so much fun for a family dessert, a date-night dessert, a girls' night dessert...anything!

Wednesday, July 3, 2013

Chocolate Chip Cookies ~ with Cream Cheese?

Alright, let's lighten things up, shall we?  Topics, I mean, referring to my last post.  Not lighten things up as in these cookies.  Let's be real:  chocolate chip cookies really should be cookies.  Not lightened up, healthified, or nutritionally sound.  There cookies.  Eat them.  In moderation, of course, but just eat them the way they were meant to be...as cookies.  I'm slightly intrigued with people's idea of adding beans and things to chocolate chip cookies in an attempt to make them healthier.  But then, I really prefer to let beans be beans...in burritos and in chili and soup.  And I just can't defile a chocolate chip cookie in that way.  That's just me.

So, in perusing Pinterest, I came across a recipe that caught my eye.  Really, I read every chocolate chip cookie recipe I come across.  Some capture me, some don't.  These did.  So I made them, with just a couple tweaks.  And they are really, REALLY, good.  They are a very soft, yet firm cookie.  Dense.  Flavorful.  Rich.  "I must have a tall glass of cold milk" kind of good.  The intriguing ingredients?  Cornstarch and cream cheese.  Don't let this turn you away.  The cream cheese gives them a soft texture, but not a cream-cheesey flavor.

They have been taste-tested by 3 out of 5 Carlsons, and heartily approved by all!  I think that equates to a 100% satisfaction rating.

The original recipe is here.  Mine is below with just a couple minor tweaks.


Chocolate Chip Cream Cheese Cookies

1/2 cup butter, softened
1/4 cup cream cheese (block-style, softened)
1/4 cup white sugar
3/4 cup dark brown sugar
1 egg
1 1/2 tsp. vanilla
2 1/4 cups flour
2 tsp. cornstarch
1 tsp. baking soda
2 1/2 cups chocolate chips, any variety you like.  (I used 1 cup dark chocolate, 1/2 cups semi-sweet)

Beat together butter, cream cheese, sugars, egg, and vanilla.  Beat for a few minutes, until light, fluffy and cream cheese is fully-incorporated.

Add cornstarch, soda, and flour.  Mix just until combined.  Stir in chocolate chips.

Line cookie sheets with parchment paper.  Using a large cookie scoop (2 inch), scoop 8 large dough balls onto each cookie sheet.  With your fingers, press balls down to form disks, making sure to keep the thickness even.  Press down the center of the disk just a tad.

Refrigerate cookie sheets for 1 to 2 hours.  (Don't skip this step.)

Bake at 350 for 9 -11 minutes, or until the edges are lightly browned and the centers have lost the "doughy shine".  Allow to cool a few minutes on the cookie sheets, then remove to wire racks.


De-lish!!

Thursday, February 14, 2013

Let's Talk About Love ~ And Chocolate Oatmeal

Ah, love.  I love love.  And a day to celebrate love?  Lovely.

Now, I must share with you one of my new loves.  I have found a breakfast that is so entirely delicious that I think I will prepare it for dessert every now and then. It is so very satisfying, and keeps me quite comfortable until lunch.  And since I've been cutting back on so much, anything that is healthy and CHOCOLATE totally speaks my love language.

This reminds me of the No-Bake Cookies I once loved.  The oats stay a bit chewy, not at all mushy, the almonds give a bit of crunch, the chocolate...well, it's chocolate!  So. Good.


Overnight Chocolate Oatmeal

1/2 cup old-fashioned oats
1/2 cup Dark Chocolate Almond Milk
6 almonds, chopped
6 dark chocolate chips, chopped

Place all ingredients into a container with a lid, cover tightly and refrigerate overnight.  And that's it!


This oatmeal has about 275 calories, 5 grams of fiber.

Hope you try it and fall in love...with chocolate oatmeal!

And on this day of loooove, I hope you have a bright, sparkly pink and happy day!

And to my love...I am madly, deeply, passionately in love with you!  Happy Valentine's Day!!

Sunday, February 10, 2013

Apple Fritter Cake

Let's start with some good news before I segue into a knocked-it-out-of-the-park recipe, shall we?


The good news for me is I am now down 14 pounds!  Yay for hard work!  A little less than 2 weeks until I have my labs redone and that is the main thing I'm working for.  But it sure is nice to see some benefits of work and discipline.

I have been a bit whiny these last few days, really wanting something rich and chocolatey.  In large quantities.  The hubs so kindly reminded me that this new craving crisis may be linked to the calendar.  Sure enough, all should be well in a couple days.  So I will keep on keepin' on and trusting the process.

Today has been an extraordinarily productive day in the kitchen.  I have pre-made four dinners so far, and am mid-process in making 24 breakfast sandwiches for the freezer.  All this means that I not only have a couple meals to give away this week, but my evenings will also be a bit smoother with the heat-n-eat meals.  And ultimately that means I get to the gym after work with less chaos.

SO!  I have been working really hard to not only monitor my own intake, but to also make sure I don't punish the rest of the family.  Yeah, I can't eat nachos during the Super Bowl, but I can still make phenomenal nachos for everyone else to enjoy.  And I still love baking as an activity.  Sometimes my cravings are more to CREATE the sweets than to eat them.

Today I decided to make a cake I found on Pinterest awhile ago.  I knew it was one that would be lovingly embraced by my peeps.  And boy-howdy.  It is a homerun.  It will forever be in the rotation of requested desserts.  Brad, after two bites, requested this for Father's Day.  It's that good.

It is an apple fritter cake.  Yes, an APPLE FRITTER CAKE!!

The link above will take you to the original recipe if you want to take a peek at that.  I tweaked it ever so slightly, feeling like a little more cinnamon would be a bonus.

And, I'm not ashamed to admit that I ate a bite to verify the oohs and ahhs.  And it's truly great.  It would make an outstanding brunch cake, or just a wowzers cake, maybe warm with a little vanilla ice cream?  Yum.  Let's get on with it, shall we?


Apple Fritter Cake

Filling:
1 heaping, spilling over cup of sliced apples.  I used 1 very large fuji apple
1/3 cup sugar
1/2 tsp. cinnamon
pinch of nutmeg
2 TBSP cornstarch
2 tsp water

Place all ingredients into a small saucepan and heat over medium-low heat, stirring frequently, until mixture is thickened and apples are softening. (About 7-9 minutes) Remove from heat and set aside to cool.

Filling #2:
1/2 cup brown sugar
1/2 tsp cinnamon

Combine well in a small bowl, set aside.

Cake:
1/3 cup softened butter
3/4 cup sugar
1/2 cup unsweetened applesauce
2 eggs
1 tsp. vanilla
2 1/4 cups flour
1 tsp. baking soda
1 tsp. baking powder
1 tsp. salt
1 tsp. cinnamon
1 cup greek yogurt (plain, nonfat)

Blend together butter and sugar until fluffy. Add applesauce, vanilla and eggs and beat well.

Sift together the dry ingredients.  Add 1/3 of the flour mixture, then 1/2 the yogurt.  Repeat, ending with flour mixture.  Blend until just combined.

Spoon half the batter into a greased and floured 9x13 pan. (Batter will be thick, so plop it around evenly and then carefully spread.)  Spoon the apple filling over the batter, carefully spreading in evenly.  Sprinkle with 2/3 of the "Filling #2" brown sugar mix.  Cover with the remaining batter, then top with remaining brown sugar mix.

Bake at 350 for 45 minutes, until cake tests done with a toothpick.

Glaze:
2 cups powdered sugar
1 tsp. vanilla
4 TBSP milk

Whisk together ingredients until smooth.  Add a tiny bit of milk as needed to get to the right consistency.

Remove cake from oven and poke a bunch of holes in it with a fork.  Immediately pour the glaze over the entire cake.

Set aside to drool...I mean cool...slightly and for the glaze to set.

Serve warm.  My peeps ate it with some vanilla ice cream and a tad bit of caramel sauce drizzled on the top.

Mercy.


Wednesday, January 23, 2013

Chicken Taco Supreme

I am loving my crockpot these days.  Again.  I even may have a bit of a dependency issue with her.  But, man, do I love the freedom of throwing stuff into her belly in the morning and then coming home to a house that smells yummy with dinner about 85% ready.  She's so good to me like that.

It's especially delightful when I find a recipe that is healthy for all of us.  And when all 5 of us love it?  10,000 bonus points.

So I found a couple similar recipes on Pinterest, and decided to try them.  But then I didn't have all the same things and wanted to add other things, and before I knew it a new dinner favorite was born! 

In case you are wanting a fast, easy dinner to feed a crowd (or a few), you might want to give this a try...


Crockpot Chicken Taco Supreme

4 lbs. boneless, skinless chicken breasts
2 packets taco seasoning
juice of 3 limes
half of a large bunch of Cilantro (add more than seems reasonable, you'll be glad)
1 - 1 1/2 cups water

Put all this into your crockpot, cook on low for 8 hours.  At that time, use a large fork to shred the chicken and stir everything around.

Add in any of these:
1 can black beans, drained and rinsed
2 cups frozen corn
1 large can olives, sliced

To serve, place in tortillas and add chopped tomatoes, chopped avocados, salsa, sour cream, cheese, or whatever you like on a taco.

In keeping with my good-girl habits lately, I just put a scoop of the meat mix onto a big bed of lettuce, added the tomatoes and avocado, and it was a tasty, tasty taco salad!  I didn't even need dressing, the juices from the meat took care of that!

You could always do the same thing with smaller quantities, of course.  This amount fed my whole family with lots left over for lunches or for me to freeze for another dinner!

Enjoy!

Thursday, January 3, 2013

Butter Has Met Its Match ~ Coconut Oil Chocolate Chip Cookies

Here's the thing.  I am a BUTTER girl.  Not margarine.  Not Crisco.  Certainly not Oleo or lard.  I shudder at the thought!  Butter.  All.  The.  Way.  Cookies are best with butter.

Until about two hours ago, I would not have swayed the slightest from that.  But now?  I have been made a believer in a new way to add the fat to my cookies.  And it is divine.  Di-VINE!

And what has won by heart?  Coconut oil.  Yes, coconut oil.  Thanks, in part, to Pinterest, I have become quite smitten with coconut oil.  I love to use it as a moisturizer.  I have made sugar scrubs with it and loved it.  I have slathered it onto myself and loved it.  I have used it sparingly in cooking and loved it.  So when I stumbled upon a chocolate chip cookie recipe that used coconut oil instead of butter, I was intrigued.  Tonight I tried it, and I wholeheartedly, without reservation, encourage you to embrace this cookie with coconut oil.  You can search coconut oil if you aren't familiar with it and read all about the wonder-claims.  I love it's texture, smell, feel, and taste.  The cookies?  MOIST, I tell you. They are soft and luscious and chewy and fragrant and stunningly delicious.  I challenge you to try these!!

I buy my coconut oil at Trader Joes, though I'm sure you can find it all over.


Coconut Oil Chocolate Chip Cookies

1/2 cup coconut oil
2 eggs
1 1/4 cups packed brown sugar
1/4 tsp. salt
1/4 tsp. baking soda
1 tsp. baking powder
1 3/4 cups flour
1 1/2 cups chocolate chips

Beat coconut oil, eggs, and sugar until well combined.  Add remaining ingredients and combine well.  Place large scoops of dough onto cookie sheet, without overcrowding the cookie sheet.  I did only 8 cookies per sheet.

Bake at 375 for 10 minutes, or until golden brown on the edges and middle is set.  Don't, for the love of all, overbake these (or any) cookies.

Let cool on cookie sheets for 2-3 minutes, then remove to cooling rack.

Then just sit back and enjoy these.  Your taste buds will dance and get all giggly, and you will feel all warm and happy and peaceful inside.  You think I jest?  Try and see for yourself!

Friday, September 21, 2012

One Stupid Boot and One Delicious Boot

There's only so much I can say about the reappearance of The Boot.  It was a stupid boot two years ago, and it's a stupid boot again today.


The reason for its return?  As stupid as the boot itself.

Twas a romantic walk on the beach.  That's it.  On our anniversary.  Beautiful sunshine, soft warm sand.  A long, long beautiful walk.  Barefoot.  And apparently that's all it took.  The next day my foot was swollen and bruised and wickedly painful.

It's some sort of ligament sprain or something, related to the cuboid area or something irritating.  So the boot for two weeks, hopefully not a day longer.  It's already getting better, and I am walking lopsided and loud and everything I despise about the boot.

Anyway, onto better topics!

We had a low-key Friday night at home.  Snuggly blanket, pizza for dinner, girls chilling out together.  And it was the perfect evening to make cookies.  So I tried a new recipe...and good gracious!  These are yuuuuumy!  I think they may be my new favorite cookie, for now.


I found this recipe on Pinterest, and it is credited to Laura Bush.  I find it interesting that these have the word "cowboy" in the title.  Cowboy boots.  My boot.  Boots are the theme.  It's meant to be.

Laura Bush's Texas Governor's Mansion Cowboy Cookies

3 cups flour
1 TBSP baking powder
1 TBSP baking soda
1 TBSP cinnamon
1 tsp. salt
1 1/2 cups butter, at room temperature
1 1/2 cups sugar
1 1/2 cups brown sugar
3 eggs, at room temperature
1 TBSP vanilla
3 cups chocolate chips (I used 1/2 dark chocolate and 1/2 semi-sweet)
3 cups old-fashioned rolled oats (I used quick cooking, all I had and was great.)
2 cups sweetened flaked coconuts
2 cups finely chopped pecans (I used just shy of this)

Preheat oven to 350.

In a large bowl, whisk together the flour, baking powder, baking soda, cinnamon and salt.

In a second large bowl, beat butter until smooth.  Add the sugar and brown sugar and beat for at least 2 minutes, until fluffy and creamed.  Add the eggs one at a time, beating well after each addition.  Add vanilla and mix to combine.

Stir in the flour mixture, blending until just combined.  Add the chips, oats, coconut, and pecans and stir until fully blended.

Drop by large tablespoonfuls onto baking sheet...do not overcrowd!  Bake for 10-12 minutes or until the edges are set and golden brown.  Allow cookies to cool on the pan for 2 minutes, then remove to cooling rack.

It's a great weekend for cookies...finally some perfectly wonderful Fall weather settling in, just in time.  Makes my heart happy!


Thursday, September 13, 2012

Back To School Lunches

One of the tasks I love to see go away at the end of the school year?  Packing lunches.  I don't know why this gets so tedious, but it just does.  Now here we are, fully back at it again.  The fall is especially crazy around here, so I've been trying to streamline our lunch-packing process.  The kids now pack their own lunches for the most part, and anything I can do to eliminate kitchen chaos makes my life calmer.  So I've found a couple things that my kids L-O-V-E, and I've made them in bulk and pre-packaged them.  Everyone's life is just a bit smoother.  At least in the lunch department.

Snack-sized zip-loc bags are my friends, and the snack-sized zip-loc containers are a must for this too.  A tiny chunk of your Sunday churning these out means a lot less thinking on school days.  Gotta save that thinking for school!


Frozen Fruit Cups

2 large cans fruit cocktail, drained well
1 large can pineapple tid-bits, drained
3 bananas, sliced
5 kiwis, peeled and sliced
Frozen blueberries (about 2 cups or however much you like)
1 cup flaked coconut
1 cup sliced almonds
1/2 can frozen juice concentrate: any tropical fruit variety

Mix everything together gently in a large bowl.  Obviously, the fruits are to your taste.  Add more or less or different, just whatever the family likes!

Scoop into small zip-loc containers, leaving a little room.  Freeze.  Put into lunches frozen and by lunch time they are a slightly-slushy fruit cup!  Great little dessert for lunches!


These next yummy little treats came from one of my little friends at school.  They are so very yummy.  A little like Chex mix, but you don't bake it.  One of the big benefits to pre-bagging these is that it slows down the biggest kid in this house from eating the entire batch in a couple handfuls.  Paces him.  Saves him from my "WHERE did all the food go?" rhetorical questions.


Seasoned Pretzels

2 16-oz. bags mini pretzels.  (I used a third of the giant bag from Costco)
1 pkg. Hidden Valley Ranch Dressing Mix (original)
1/2 tsp garlic powder
1/2 tsp onion powder
2 TBSP dill weed
12 oz. Orville Redenbachers Popcorn oil

Mix together everything but the pretzels.  Pour over pretzels in a large bowl.  Stir well, then stir every 30 minutes until the pretzels start to look dry.  (They will look very wet at first, bu the pretzels absorb the oil and they do get dryer!) 


Out of time for today!  I have also frozen breakfast sandwiches, pre-bagged popcorn, made 3 batches of mini-muffins (pumpkin and banana) and frozen those in snack-sized baggies.  Lots of easy choices for the kids to grab and add to their lunches!

Almost Friday of the first FULL week of school!  Amen and hallelujah.

Monday, August 6, 2012

A Fair To Remember ~ With 2 Winning Recipes!

Let's get straight to it, shall we?

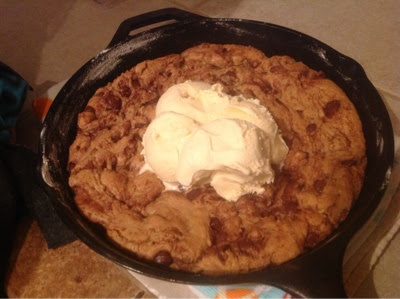
This past week, my friend entered her chocolate chip cookies into the Thurston County Fair.  I didn't even know this contest existed, until her husband announced her as a Blue Ribbon Winner!  These cookies are so good, and they already have a reputation around our corner of Thurston County.  Everyone loves Laura's cookies.  Now it's official, though:  they are the best in the county!

Mmmm...can't you almost taste them??

Laura's Blue Ribbon Chocolate Chip Cookies

1 1/2 cups butter, softened (BUTTER!)
1 1/4 cups white sugar
1 1/4 cups packed brown sugar
1 TBSP vanilla
2 eggs
4 cups flour
2 tsp. baking soda
1/2 tsp. salt
4 cups chocolate chips

Heat oven to 350. Beat butter, sugars, vanilla and eggs until light and fluffy.  Stir in flour, baking soda and salt. Dough will be stiff.  Stir in chocolate chips.  (I used 1/2 semi-sweet chocolate chips and 1/2 dark chocolate chips.)

Drop by heaping tablespoonfuls onto cookie sheet. (Laura uses x-large cookie scoops to make big 'ole yummy cookies.)  If you make giant ones, only drop 6 per cookie sheet so they have them room they need and the heat can circulate around them and cook them evenly. 

Bake for 11-13 minutes, depending on cookie size, just until they are beginning to turn golden brown.


So after Laura's big win, I started poking around on the Fair's website to see what kinds of things you could enter.  Well, much to my delight I saw there was to be a cupcake contest the next day!  I decided to enter for fun.  I almost chickened out, because as I was baking them I realized that the whole idea of entering something like this is for people to judge you, and I'm so not a fan of being judged. Who wants to set themselves up to be judged and critiqued and analyzed.  Well, apparently a lot of people do because the fair is FULL of entries of all sorts of things.  (A side note here:  did you know that people bring their mommy cows with their new babies and strut them around a ring and people judge the cow on how she looks as a mom????  Can you imagine such a thing in the people world??  Walking around a ring with a newborn babe while people critiqued you on how you looked as a mother, how your body shape looked for birthing and how your...udder...was producing for your baby????  UGH! So thankful I was not born a cow.)

Anyway, with a few jitters and "what in the world am I doing this for???" I dropped my cupcakes off to be judged.

We then had the delight of watching the oh-so-handsome Brayden show his cow and a horse and a pig and a sheep and a goat in something called a Round Robin.  His "reward" for winning Best Showman (I think that's the title?) for showing his cow was to have to show all these other animals and be judged.  Bless his heart.  Actually, he's a stud and handled it fabulously.  I wish I had snapped a picture of that handsome dude doin' his thing.  I think he was the best.  And from the last 2 paragraphs you can probably tell I really am qualified to judge him.  But he still was the best.

So...I sat and watched the three judges judge all the cupcakes.  And in the end?  I took 2nd place!  Well, I'll be.  I lost out to Pumpkin Ginger.  Silly judges.


But, the cupcakes were a hit, I got a red ribbon and a gift certificate for pizza!  I think I might be hooked now.  Perhaps I'll enter a few more things next year.

Without further blabbering, I give you the Red Ribbon Award-Winning Cupcakes:


Leanne's Red Ribbon Chocolate Fudge Salted-Caramel Cupcakes

Cupcakes:
(adapted from Georgetown Cupcake recipe!)
1 1/4 cups flour, sifted
1/2 tsp. baking soda, sifted
1/4 tsp. salt
1/2 cup butter, at room temperature
1 1/4 cups sugar
2 large eggs, at room temperature
 1 tsp. vanilla
1 cup whole milk, room temperature
1/2 cup cocoa, sifted
(I used an expensive all-natural cocoa powder. I will try it with my trusty Hershey's Special Dark cocoa next time and see if there's a big difference. I suspect there is.)

Preheat oven to 350. Line cupcake pans with cupcake liners (will make 18).

Sift together flour, baking soda and salt onto a sheet of parchment paper or waxed paper, or even a plate.

In a stand mixer or with a hand-held mixer, beat softened butter until fluffy.  Add the sugar and beat until well-incorporated.

Add eggs, one at a time, and beat well.

Combine the milk and vanilla in a measuring cup.

With mixer on low, add 1/3 of the flour mixture, then gradually add 1/3 of the milk mixture.  Repeat until you've added all the flour and milk.

Add the cocoa powder and mix until blended well.

Using a standard-sized ice cream scoop, fill each cupcake liner to 2/3 full. Bake for 18-20 minutes or until cupcakes test done with a toothpick or they spring back up in the center when lightly touched with your finger.

Allow to cool completely.  Using a small melon-baller or just the tip of a knife or spoon, remove a little ball of cupcake out of the very center.  Munch on the little removed pieces as you prepare the caramel.


Salted Caramel Frosting

1/2 cup salted butter
1 cup dark brown sugar
1/3 cup heavy cream
1/4 tsp. salt
2-2 1/2 cups powdered sugar, sifted

Melt butter in small saucepan.  Add brown sugar and cream.  Stir constantly over medium heat until sugar is dissolved.  Add salt.  Allow to slightly bubble (not boil!) for about 1 minute.  Remove from heat and set aside to cool.

When cooled, set aside about 1/2 cup of the caramel to use as your filling and drizzle.

To the remaining caramel, beat in powdered sugar, one cup at a time until it reaches the right consistency for frosting.

Place about 1 tsp. reserved caramel into each cupcake hole.  Frost  with frosting, then drizzle with remaining caramel.